
Quick Start Guide - Rons Data Merge
This guide will help you get started with Rons Data Merge in a few minutes. You will open a table, pick a merge type, shape a template, preview one row, and run output to a file—or to an inbox, if you are feeling sociable.
A free Lite version is available if you want to follow along on your own machine. The Lite build limits each run to 250 rows but does not cap loading or previewing.
1. Install and Open the Application
Download and install
Rons Data Merge, or use the portable build if you prefer not to install. When the
application starts, create a new merge or open an existing
.merge project that already remembers your last
job.
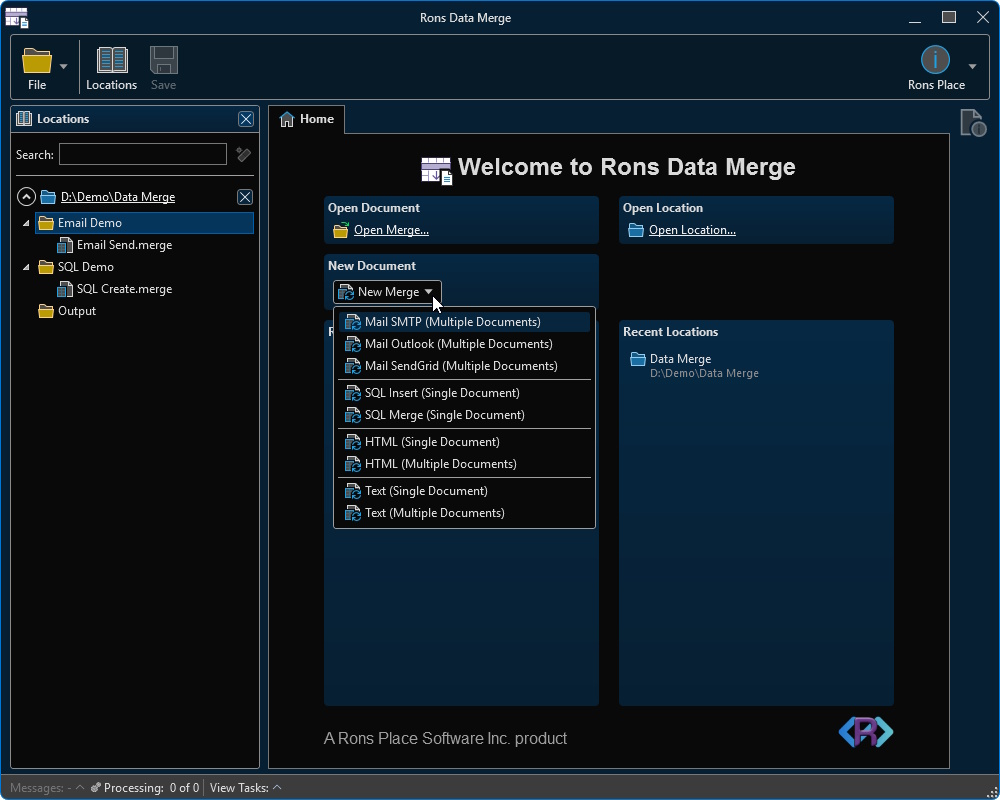
A short in-application guide is also available from the merge window if you want a reminder whilst this article is not open.
2. Load Your Data
Open a delimited file (CSV, PSV, TSV, TAB, TXT, and so on) or paste a table from the clipboard. If separators look wrong, adjust the data profile—delimiters, quoting, header row—and check Document Properties for encoding if accented characters look as though they have been through a tumble dryer.
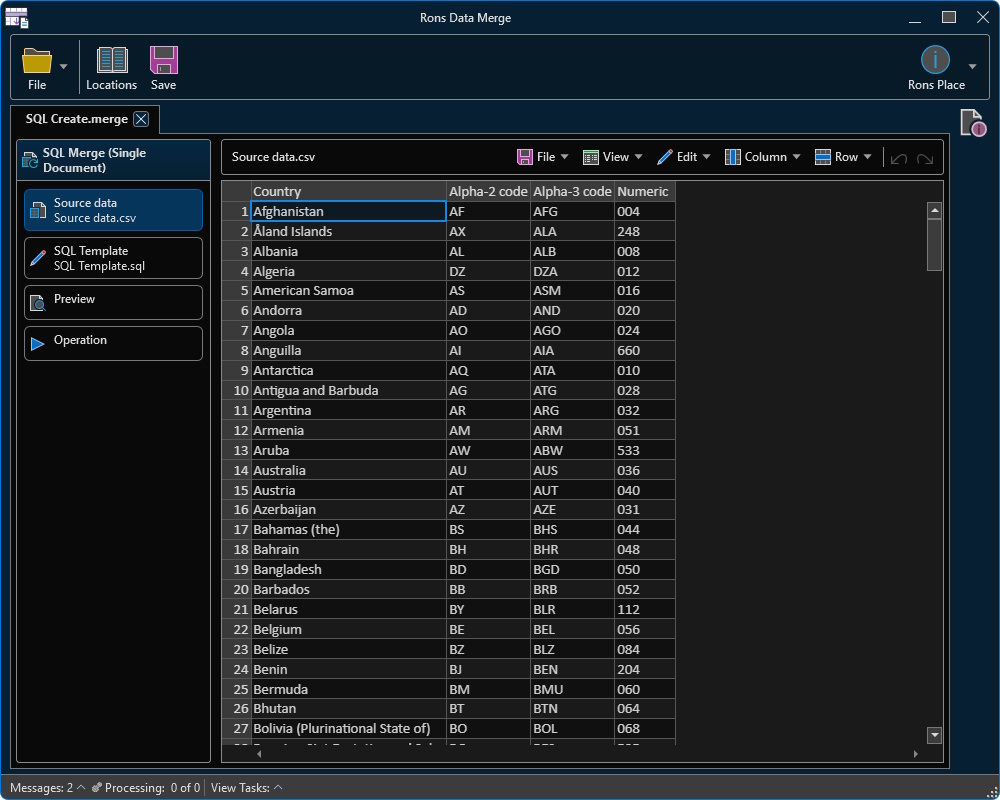
Skim the grid: column names are what templates use. Rename
columns here if you prefer FirstName to Column3. Edit
cells, add or remove rows, and sort or search until the table reflects reality.
There is little point merging wishful thinking.
3. Choose a Merge Type
Pick the output that matches the job:
- Text or HTML, one document — one file with header, repeated body, and footer.
- Text or HTML, one file per row — a folder of numbered outputs.
- SQL Insert or SQL Merge — one script file built from the rows.
- Mail — one message per row via SMTP, Outlook, or SendGrid.
The application supplies a sample template for the type you chose. Keep it for reference or replace it forthwith.
4. Edit the Template
Open the template editor and write the document around column fields—placeholders that expand to the current row’s values. Use the Insert menu to pick a column by name instead of typing markers from memory.
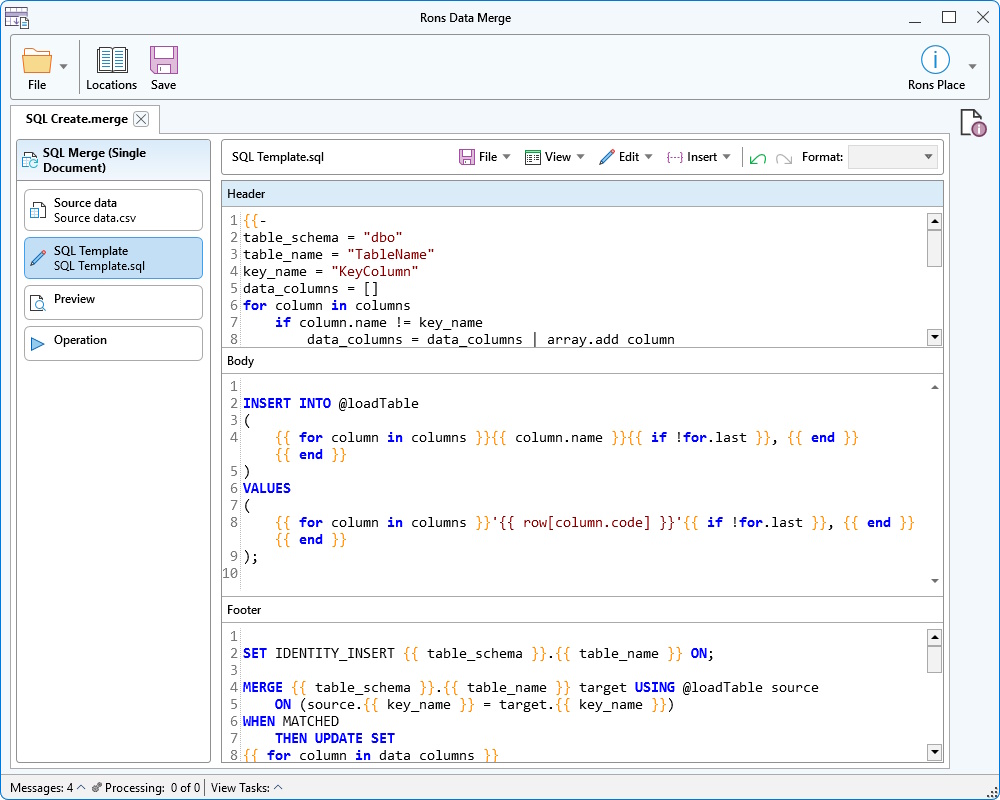
For a single-document merge, edit header, body, and footer separately. The body repeats for each row; header and footer bookend the lot. For one file per row, the whole template is one complete document per record.
Column loops walk all columns—useful when the export gains new fields and you would rather not rewrite the template every time marketing invents another attribute.
5. Configure Mail (Mail Merges Only)
If you selected Mail:
- Edit both the HTML and plain-text templates.
- Open mappings and connect columns to To, From, Subject, and (for Outlook) CC / BCC as needed.
-
Choose SMTP, Outlook, or SendGrid
and enter the server or API settings. These stay with the
.mergefile on your computer.
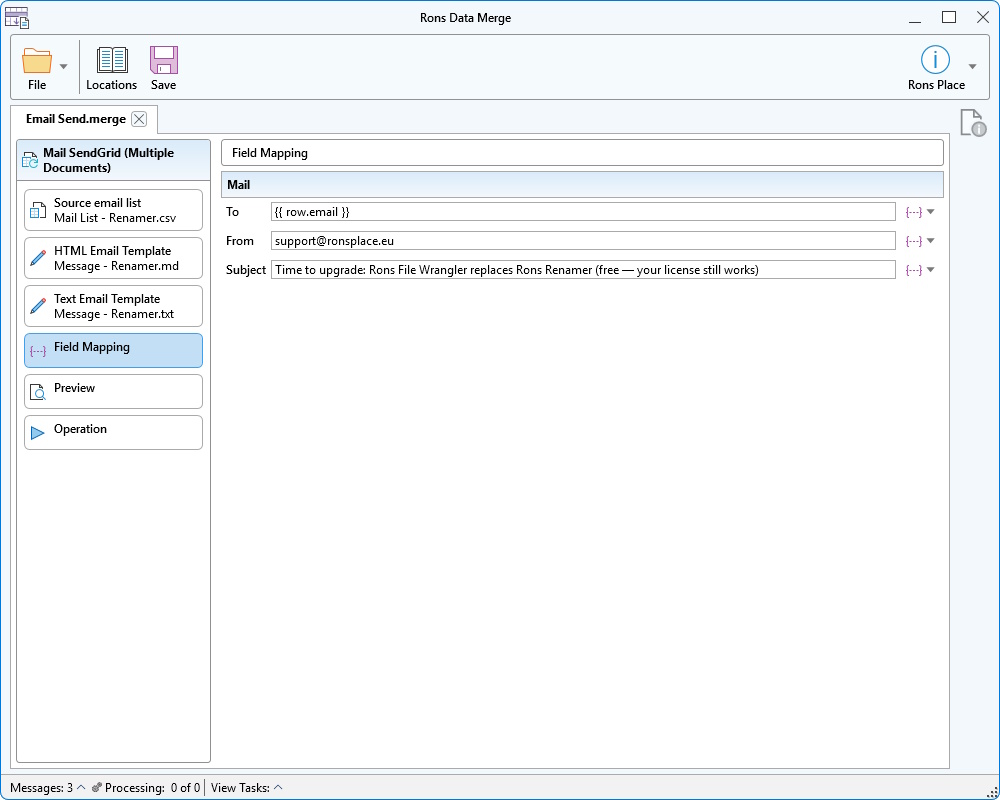
The application checks required fields before it will run—rather kind, given how easy it is to forget a From address until recipients begin to wonder.
6. Preview a Record
Use first, previous, next, and last to step through rows and read the filled template for each. For HTML or Markdown, turn on preview and try a style (Plain, Editorial, Newsletter, Soft, or Brief) until the result looks presentable.
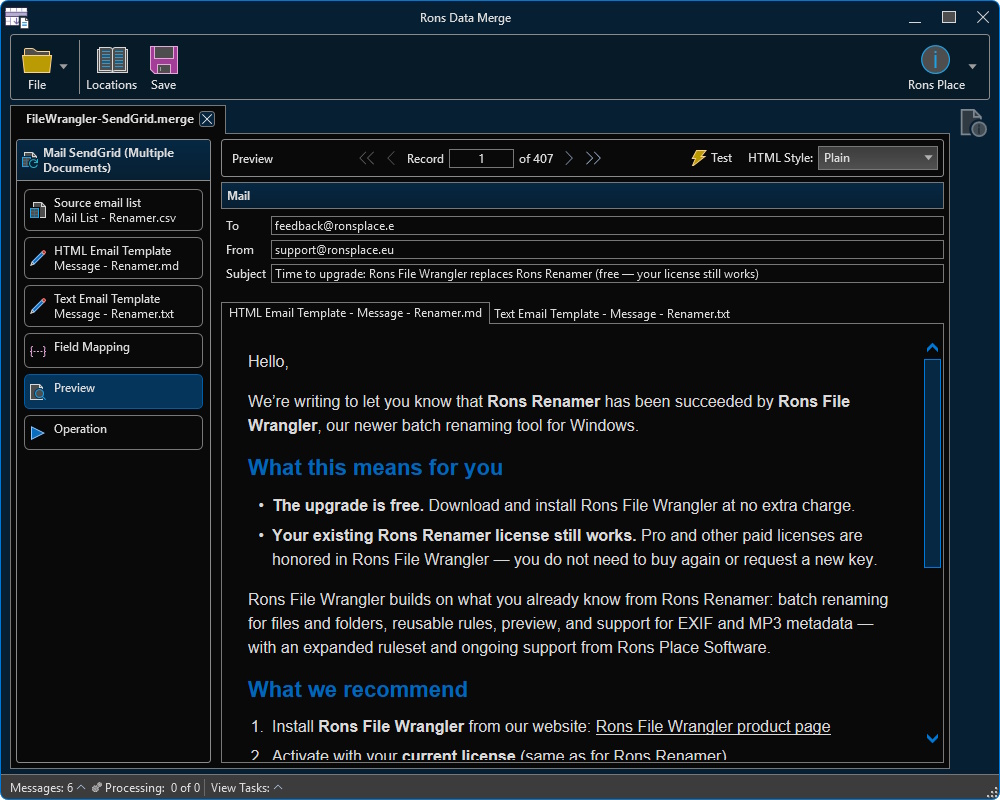
For mail, send a test message for the current row to your own address before releasing the hounds on the full list.
7. Run the Merge
Set the output folder or file path (for non-mail merges). Choose whether to overwrite existing files. Press Start.
- File merges write text or HTML to disk, or build the SQL script.
- Mail merges send one message per row and record progress in the mail log.
Stop cancels a long run if you notice halfway through that you mapped LastName to the subject line. We have all been there; we simply prefer not to repeat it.
8. Save Your Work
Save the project as a .merge file. It stores the
data file path, templates, mappings, and settings so the same job can be opened
later—new data, same template, considerably less swearing.
Use Locations to open a folder that holds your CSV files, templates, and saved merges together; refresh, rename, or reveal in Explorer from the location tree when housekeeping calls.
What's Next?
You now have enough to produce documents or mail from a table on Windows. For a broader tour of merge types, templates, and the grid, see the Overview of Rons Data Merge.
As you go further:
- Read Rons Data Merge — Features for validation, message history, delimiter profiles, and appearance options.
- Visit the Rons Data Merge product page for downloads, licensing, and updates.
- If CSV structure trips you up before you merge, What is a CSV File? explains delimiters and quoting without moral judgement.
If you have questions or documentation suggestions, contact us. We are rather fond of feedback from people who merge data for a living—and equally fond of hearing when a template marker was wrong in the sample, so we can fix it before the next victim.
Related Information
Rons Data Merge
General


